In our mission to avoid the expensive kitchen and bathroom renovations, we’ve just completed another transformation of a small, less important space in our house. Hooray! 😅
Take a tour of the before, during and after of our brand new hallway 👇
The Before
Ah… the humble hallway.
It’s often rather low on the list of priorities when you move into a new home. It took us five years to get around to it (which is still sooner than our bathrooms and kitchen!)
We’d hung some family photos on the walls but didn’t do much else. We had a vision of what we eventually wanted, so we didn’t want to get too ahead of ourselves until we had the time to dedicate to the real deal.
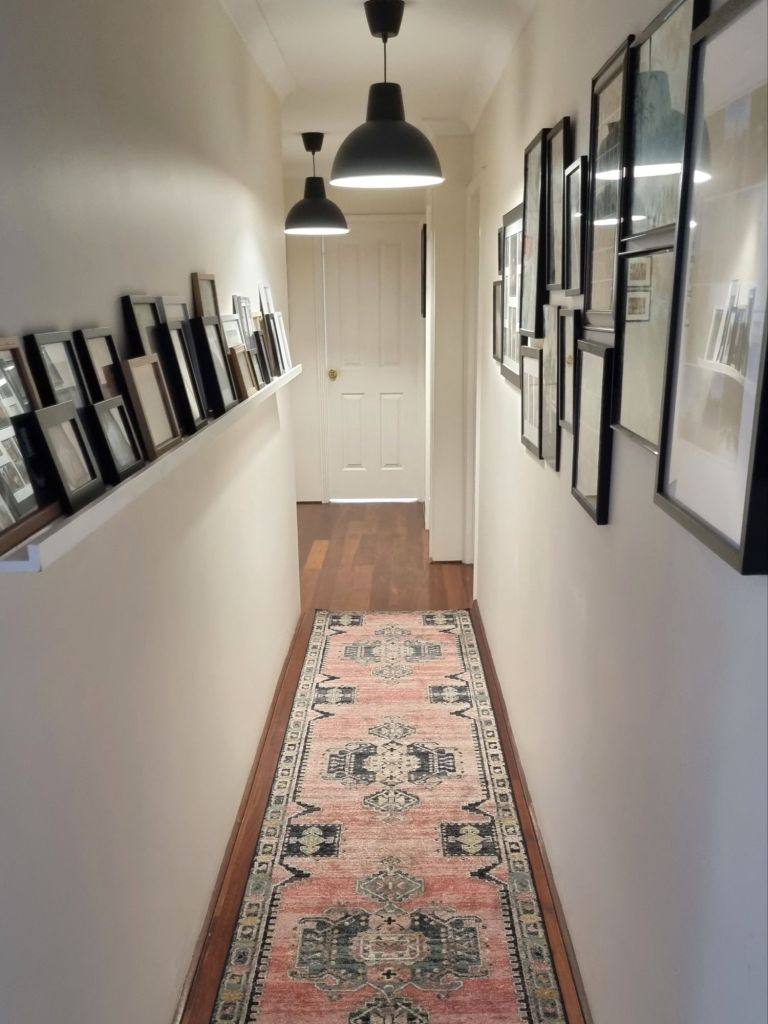
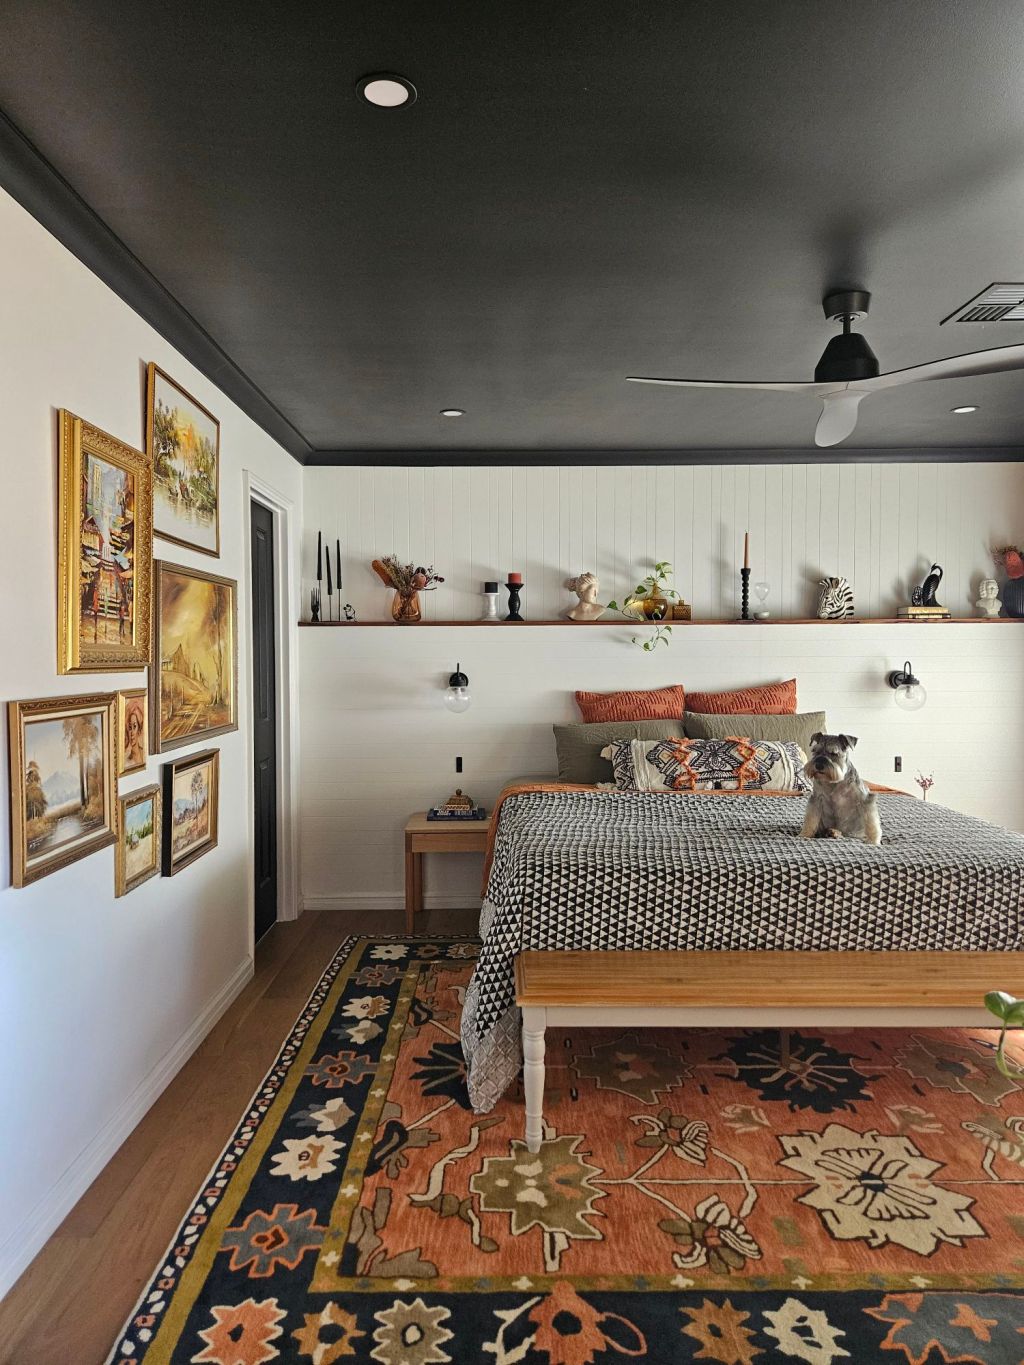
The ‘before’ definitely had way too many family photos! We had an all black gallery wall on one side, and a picture ledge with photos on the other side. For such a narrow space, it felt too cluttered, and with nothing done to the walls themselves, it still felt boring despite my attempt at decorating it.
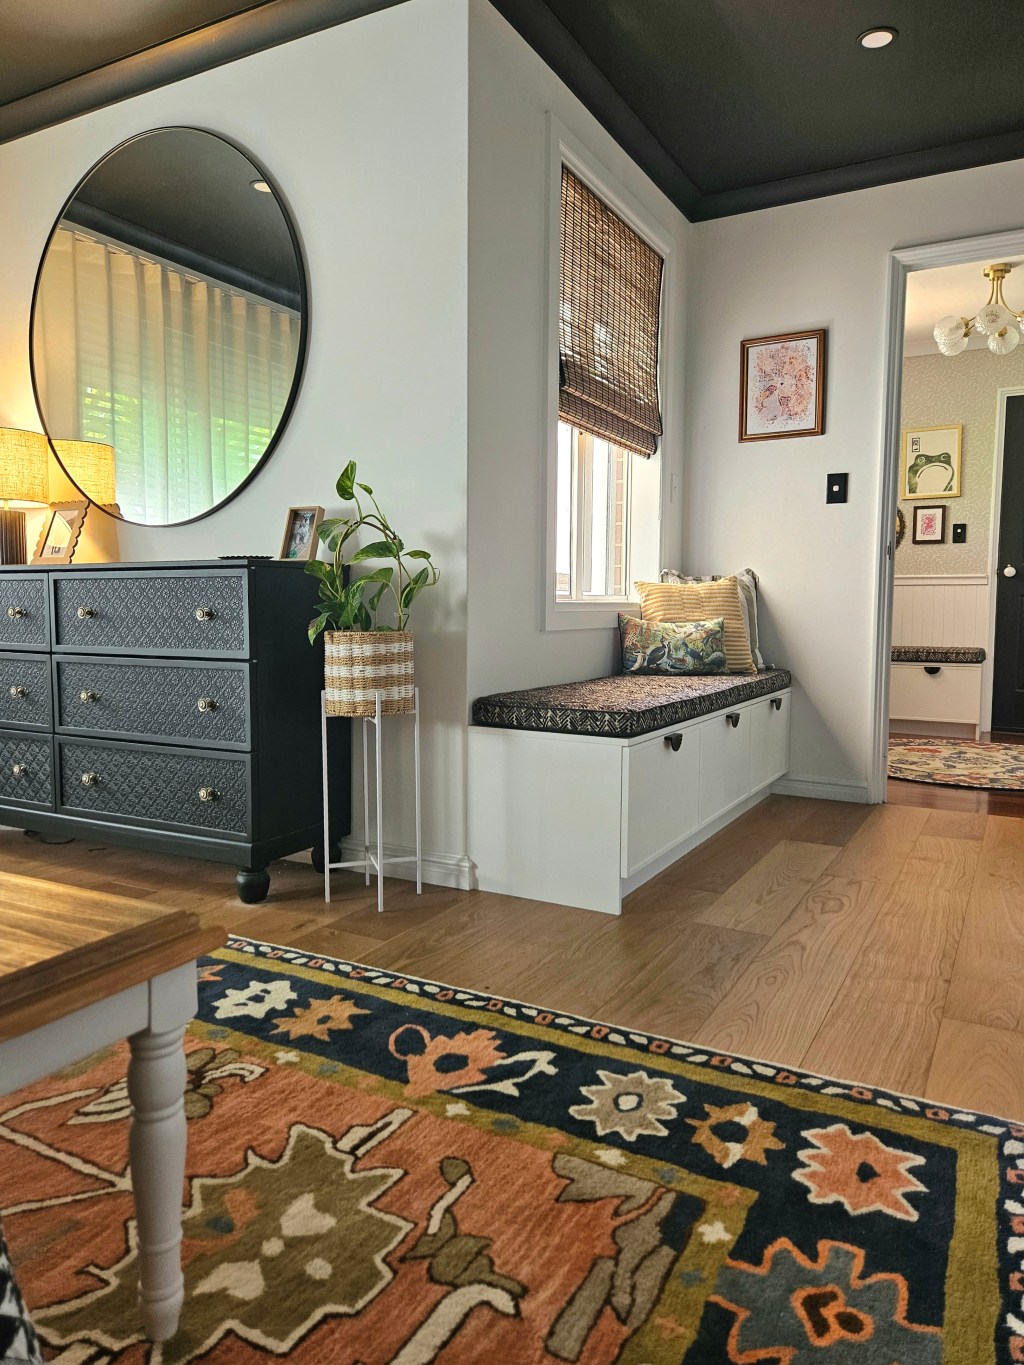
We had a dresser in the landing area at the end of the hallway to fill the space… but even that was underwhelming. Plus, the lights were way too low and Martin was constantly ducking his head on the way to the loo!
We painted all our doors black a year or two ago, which helped create a bit of contrast in the hallway, but it wasn’t enough to make the space feel designed.
So long story short…. the space needed a complete overhaul!
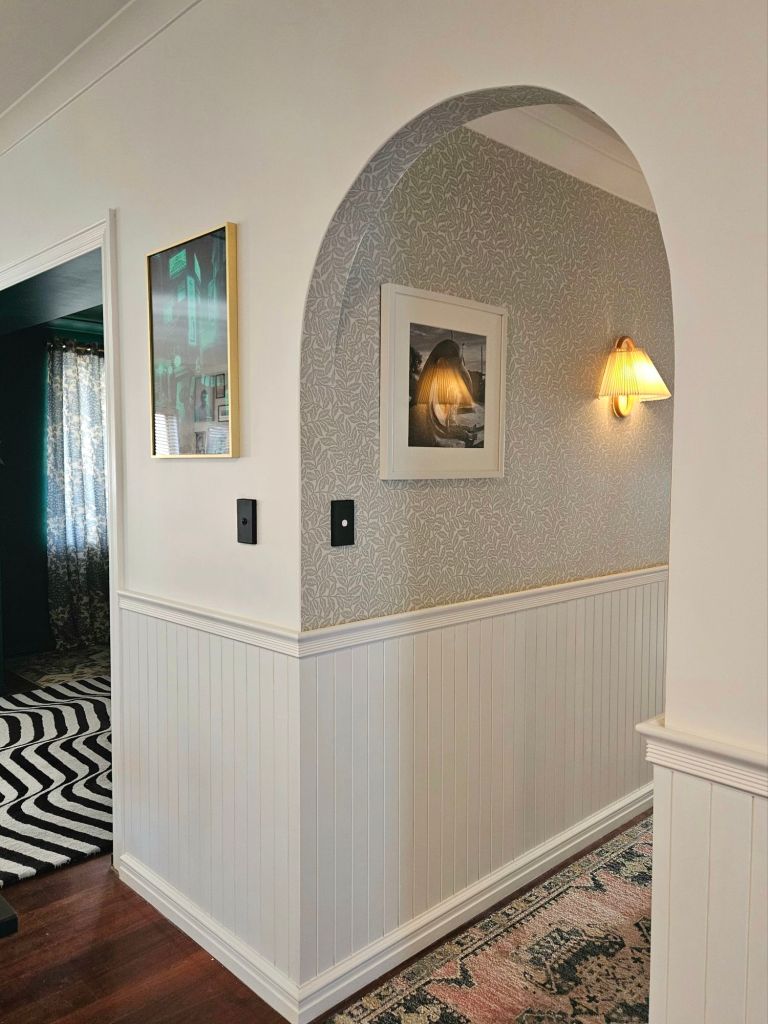
Archway
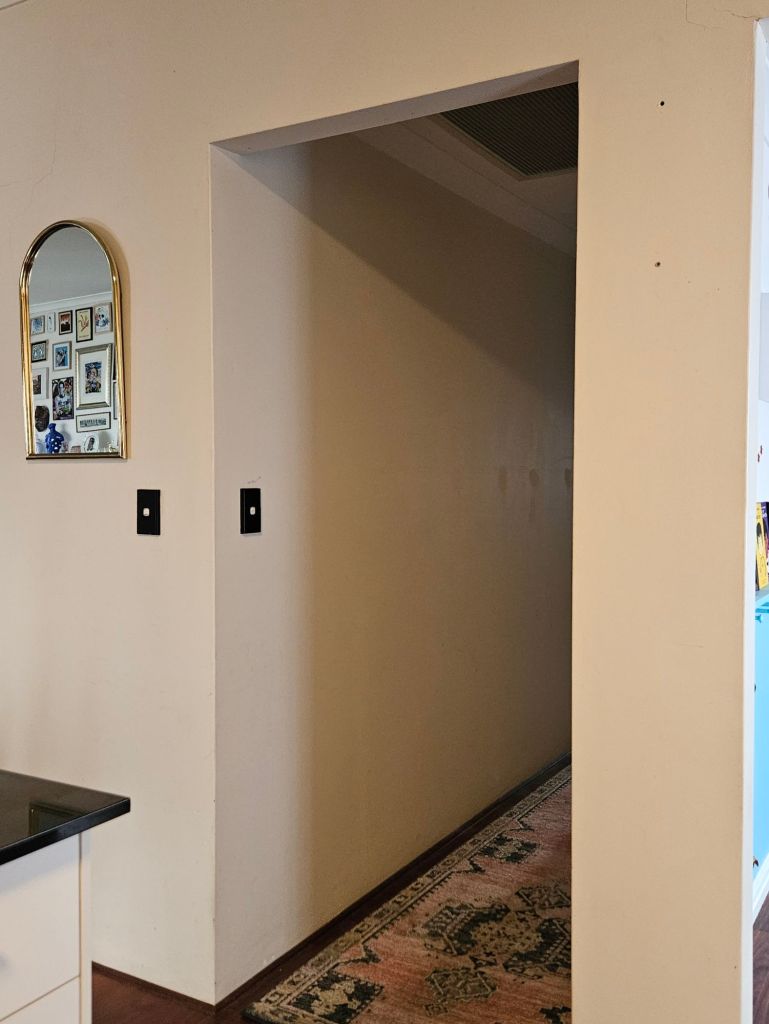
The first thing we addressed was the passageway to get into the hallway, which is adjacent to the kitchen and beside the entry to our library.
There was nothing wrong with the passageway… it was just square and builder-basic and not the vibe we wanted.
So we decided to convert it into an archway.
To do this, Martin cut some plasterboard at the radius we wanted, built a frame to attach that to, and did a whole lot of plastering and sanding and painting!
Full details on how to DIY this in this reel 👇
🎬 WATCH: Building an archway
Going from square to curved has totally transformed the feeling of the space and really sets the tone for what’s to come.
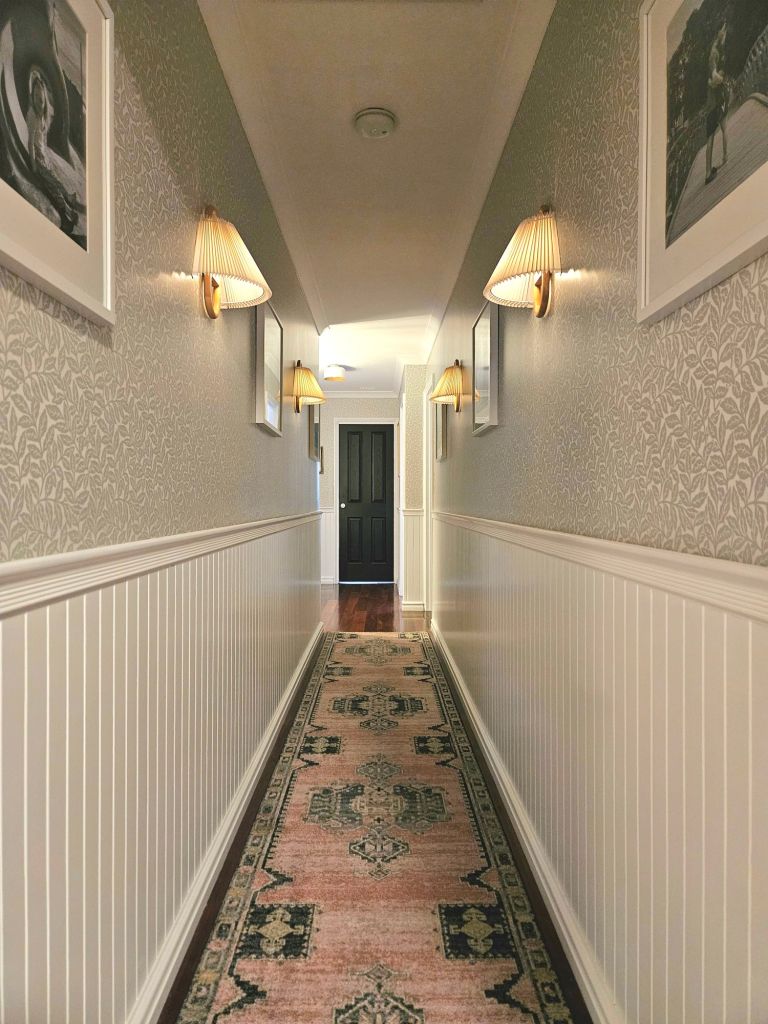
Wallpaper & Wall Panelling
We decided to continue the wall treatment from our entryway into the hallway. Since they’re both connecting spaces that lead to other rooms, it made sense to give them the same vibe.
👀 READ: Our Classic Meets Quirky Entryway Renovation
Martin installed VJ60 wall panels from Easycraft Panels, added skirting on the bottom and chair rail moulding at the top, and painted it all with our go-to neutral, Taubmans Crisp White.
Especially in a space lacking furniture, wall panelling just makes the walls look so much more considered and thoughtful. The panelling has added interest and character to the walls, plus the vertical lines draw the eye up and make the space feel more vast.
Once that was done, we added the same Ash Branch wallpaper used in our entryway. Martin wasn’t super keen on wallpaper, but I insisted we needed some pattern. So glad I won that battle because the wallpaper makes all the difference 😍
But before we could do anything to the walls, there was a lot of prep work to be done so we could install the wall lights we wanted.
Lighting
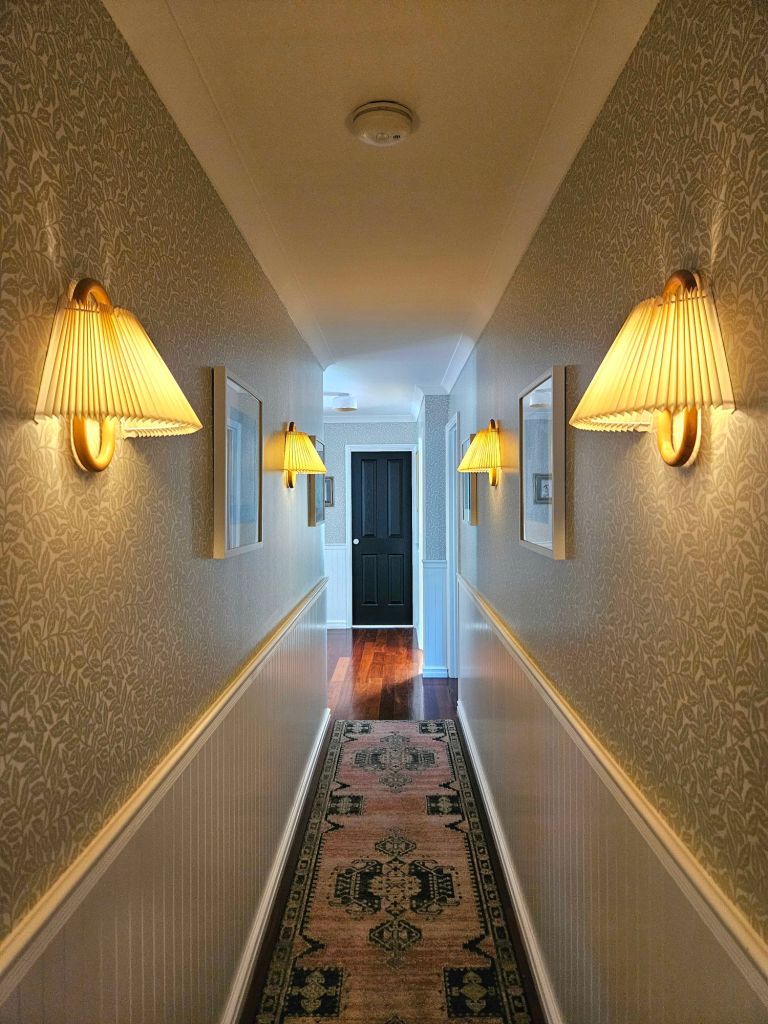
Our hallway was really dark, especially when all the bedroom doors and windows were closed.
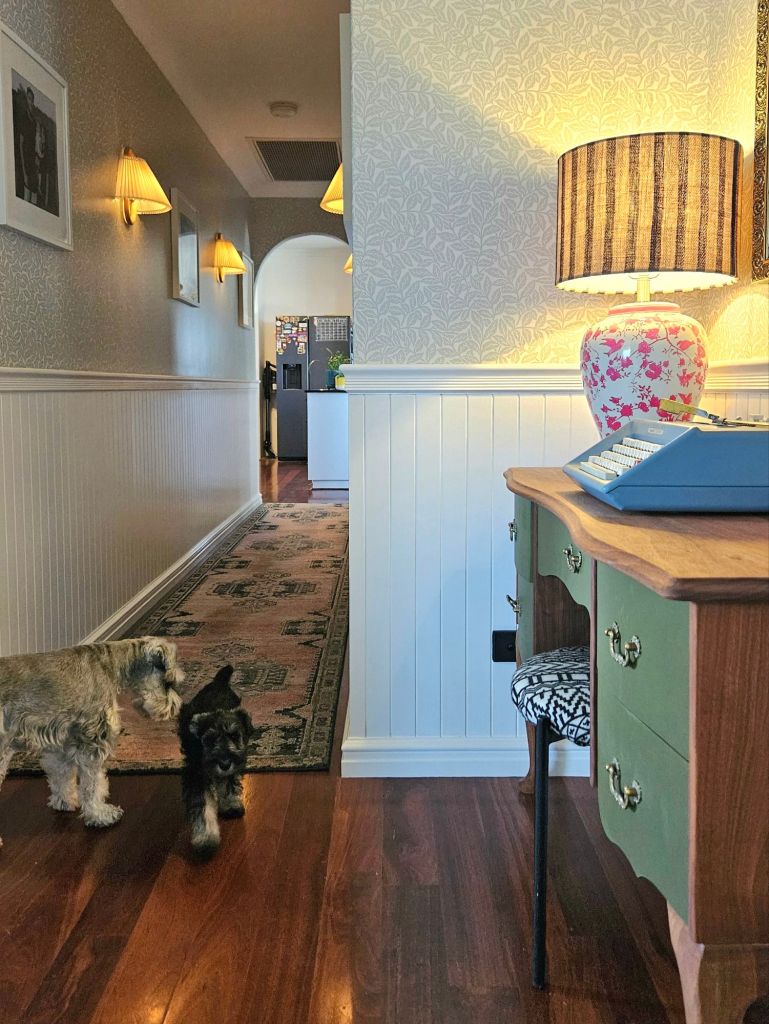
Since the hallway is quite long, we decided to install wall sconces to help distribute more light.
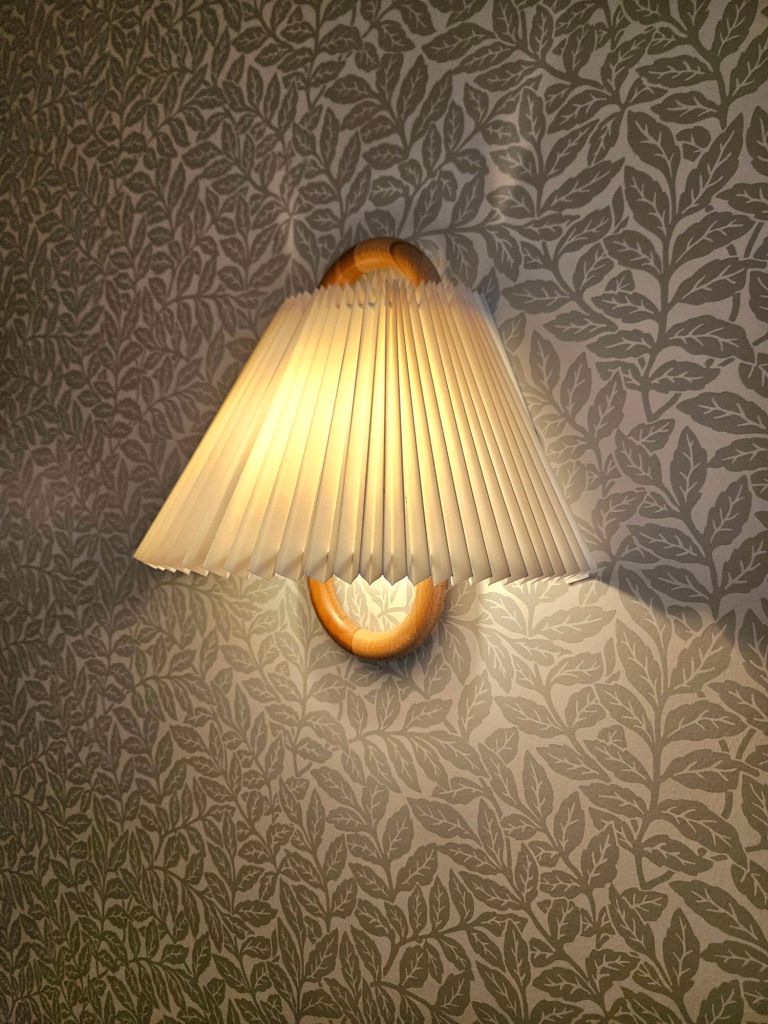
We installed four Aine wall lights from Residence Supply, which have a timber frame and pleated white shade. They’re dimmable, so we can keep them super low and ambient without illuminating the space too much.
I’ve always wanted wall lights, but had no idea how much work is involved to wire these after a house is built!
Martin needed to “chase the walls”, which meant he basically had to dig them out to allow for cabling. Once all the wires were in, he had to putty all that up to create a smooth surface for our wallpaper.
It was messy work, but definitely worth it. The wall lights have added such a lovely feeling to the hallway. A few friends have described it as “hotel-y” which I’m OK with!
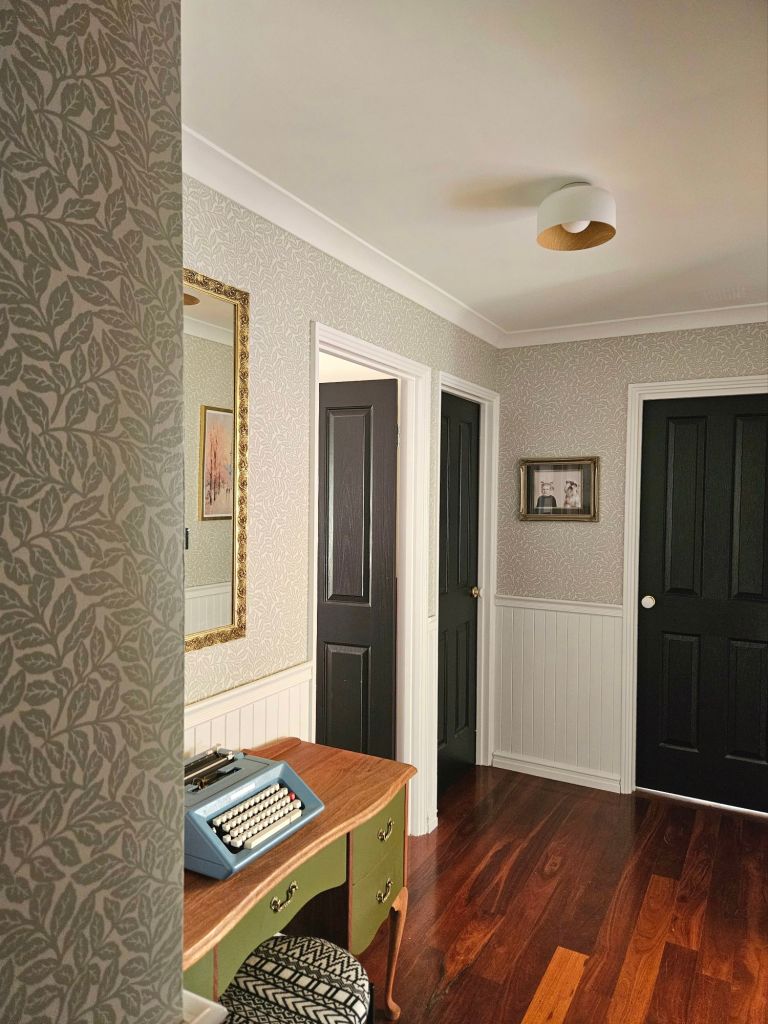
We also removed the two black IKEA pendants and just installed one simple ceiling light in the landing area.
This is the Folkio ceiling light also from Residence Supply. If you need lighting or lamps, you can use our code MISMATCHED for 10% off.
Furniture & Decor

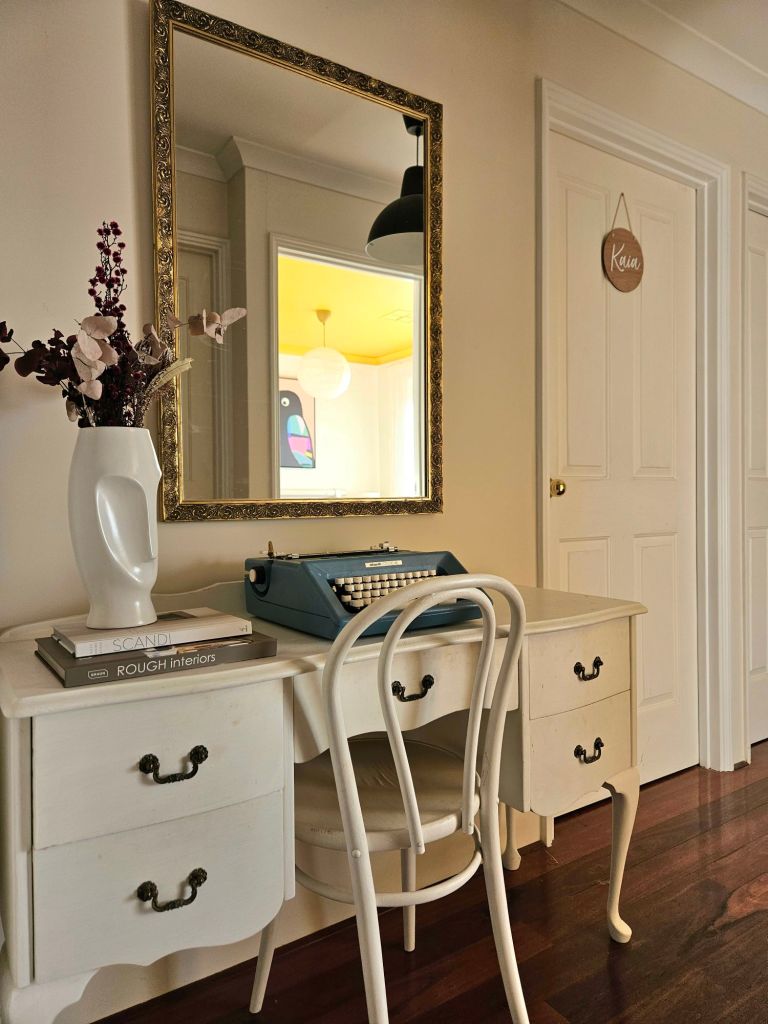
In the landing area, we had a white painted Queen Anne dresser that fit the nook perfectly.
We wanted to keep it, but not as is. I had a sneaking suspicion that under all that white paint was a pretty wood grain… and I was right!
We stripped the white paint off, which wasn’t a fun process, but we got there. The drawers however were not made from the same timber, so we had to paint those. We used Dulux Olive Blend for the drawer fronts and gave the handles a good ol’ clean with Brasso. There was probably decades of dirt on them; they came up so nice!
🎬 WATCH: Dresser Upcycle
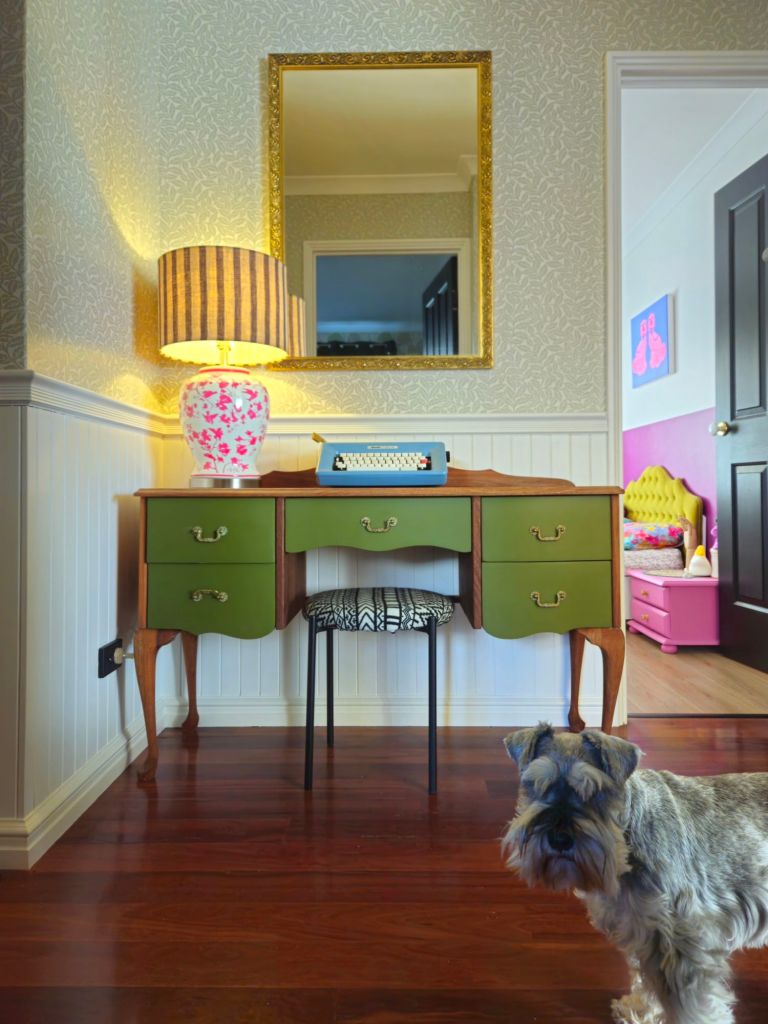
I found a cheap stool at the opshop, which previously had a dirty lilac seat. At that same opshop, I found a black and white fabric shawl that I cut up and stapled to the seat. It works, but I’ll probably find something a bit nicer one day.
We also found the mirror at an opshop for $20, which was already in this spot before along with a blue typewriter we bought via Facebook Marketplace.
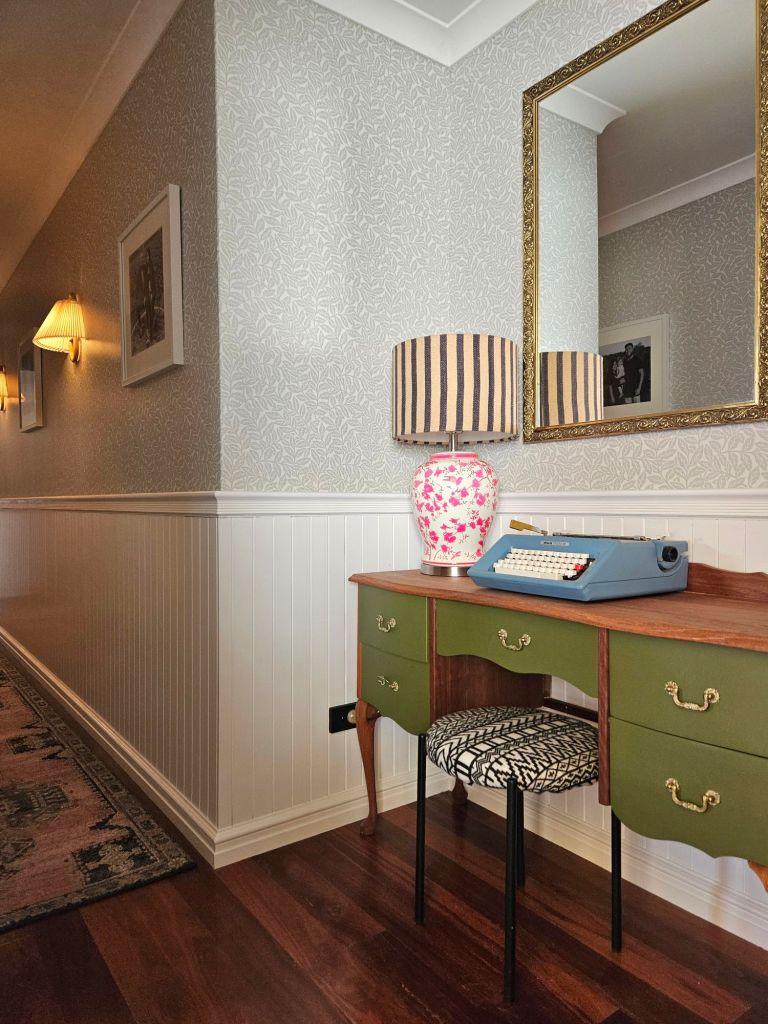
The pink and white bird lamp base is from Black Mango, with a $10 shade I found via Marketplace. The lamp originally came with a plain white shade, but I wanted to add a bit more colour to the space since there’s already a lot of white. Again, I’d love to get a custom shade made that complements the base a bit nicer, but for now I just wanted to switch it up quickly and affordably!
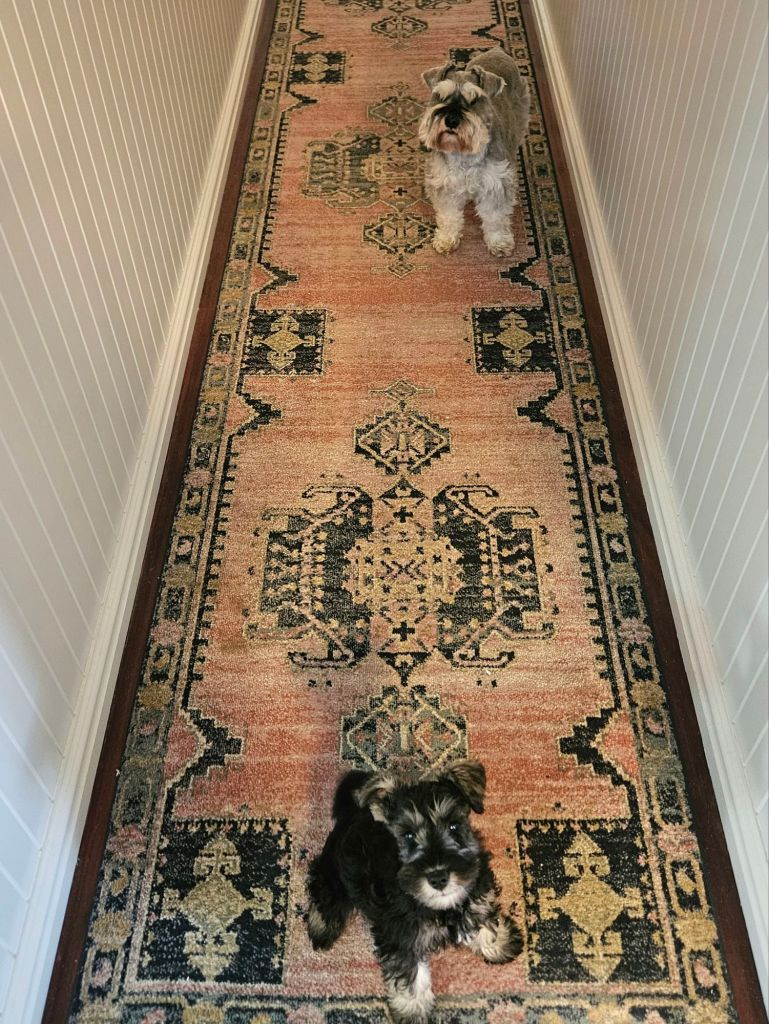
We kept the runner rug we already had because we still love it, plus it’s the exact length of the hallway. We got it from Sydney Rugs Online five years ago and it adds beautiful colour and pattern to the space.
Wall Art

We still wanted to display family photos in this space… just not as many!
I bought six square white frames and filled them with a select few favourite family photos, all printed in black and white. We hung them evenly on either end of the wall lights on both sides of the hallway. The new symmetry in here is super satisfying! 👌
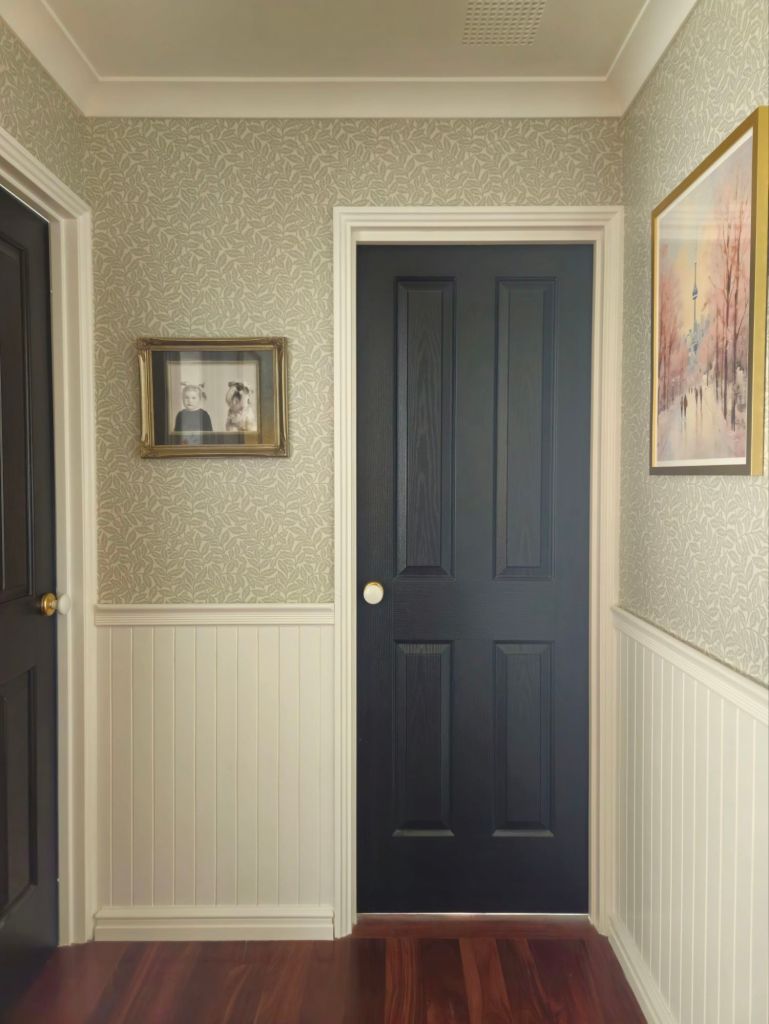
On the small wall between our guest bathroom and loo, we’ve got a pretty framed photo of Kaia and Magnus when they were little. Now that we have another puppy, we’ll have to include Axel somewhere too!
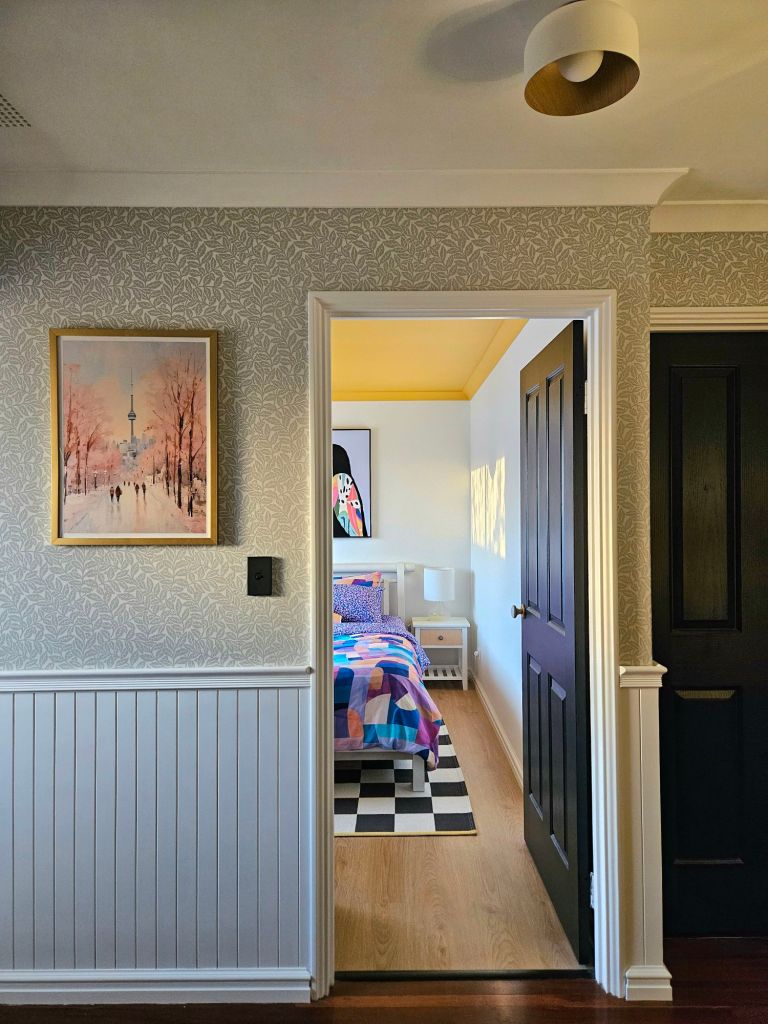
On the other small wall between our loo and guest bedroom, we have a framed artwork of Toronto in the Winter, where Martin and I lived for two years when we first got together 💌
The After
Just like our entryway, this space is a lot more traditional and pared back than our other spaces, which was totally intentional. It’s a transitional, connecting space after all, so there was no need for it to be loud… and I’m a firm believer that you need to give the eye places to rest.
It was a really long renovation, probably because of the extra work required with the archway and wall lights, but now that it’s finished, it was definitely worth it! I love how special it feels for a purely functional space, and it’s much brighter and put together than it was before.
Follow us on Instagram for more from our home and download my new eBook for more interior design tips.


Leave a reply to Cece Cancel reply